Showing posts with label Step-by-Step. Show all posts

11/20/2015

Winners & Top Picks for October 2015

Again - thank you all for joining us troughout our celabration month October! Today we bring you the winners and top picks from the Challenge.

Top Picks

Ansku


Heike 

Sandra Bernard

Eirini

Winners

The winner of the prize from 2Crafty Chipboard


is
Laetitia


And the prize pack from Scrap Unlimited


is

Melenia


And the winner of the Special Gift 


is

Jenny


Please send a mail to wordspaintery@gmail.com to claim your prize.

We hope to see you all back for the November Challenge!


11/10/2015

Celebrate with Us & Sanderijn de Bruin-Mittendorff

We hope you have had a great month with us and that our Creative Team has brought you loads of inspiration. Today is the last tutorial day and our new Creative Team Member Sanderijn bring us this stunning layout.


Step-by-step


Step 1:
 Cut some pieces of paper, and composition your centerpiece. I also used a doily, some tack-cloth and some wire behind my picture. Do not glue it down jet, this is just the fase where you want to make a composition.


Step 2: 
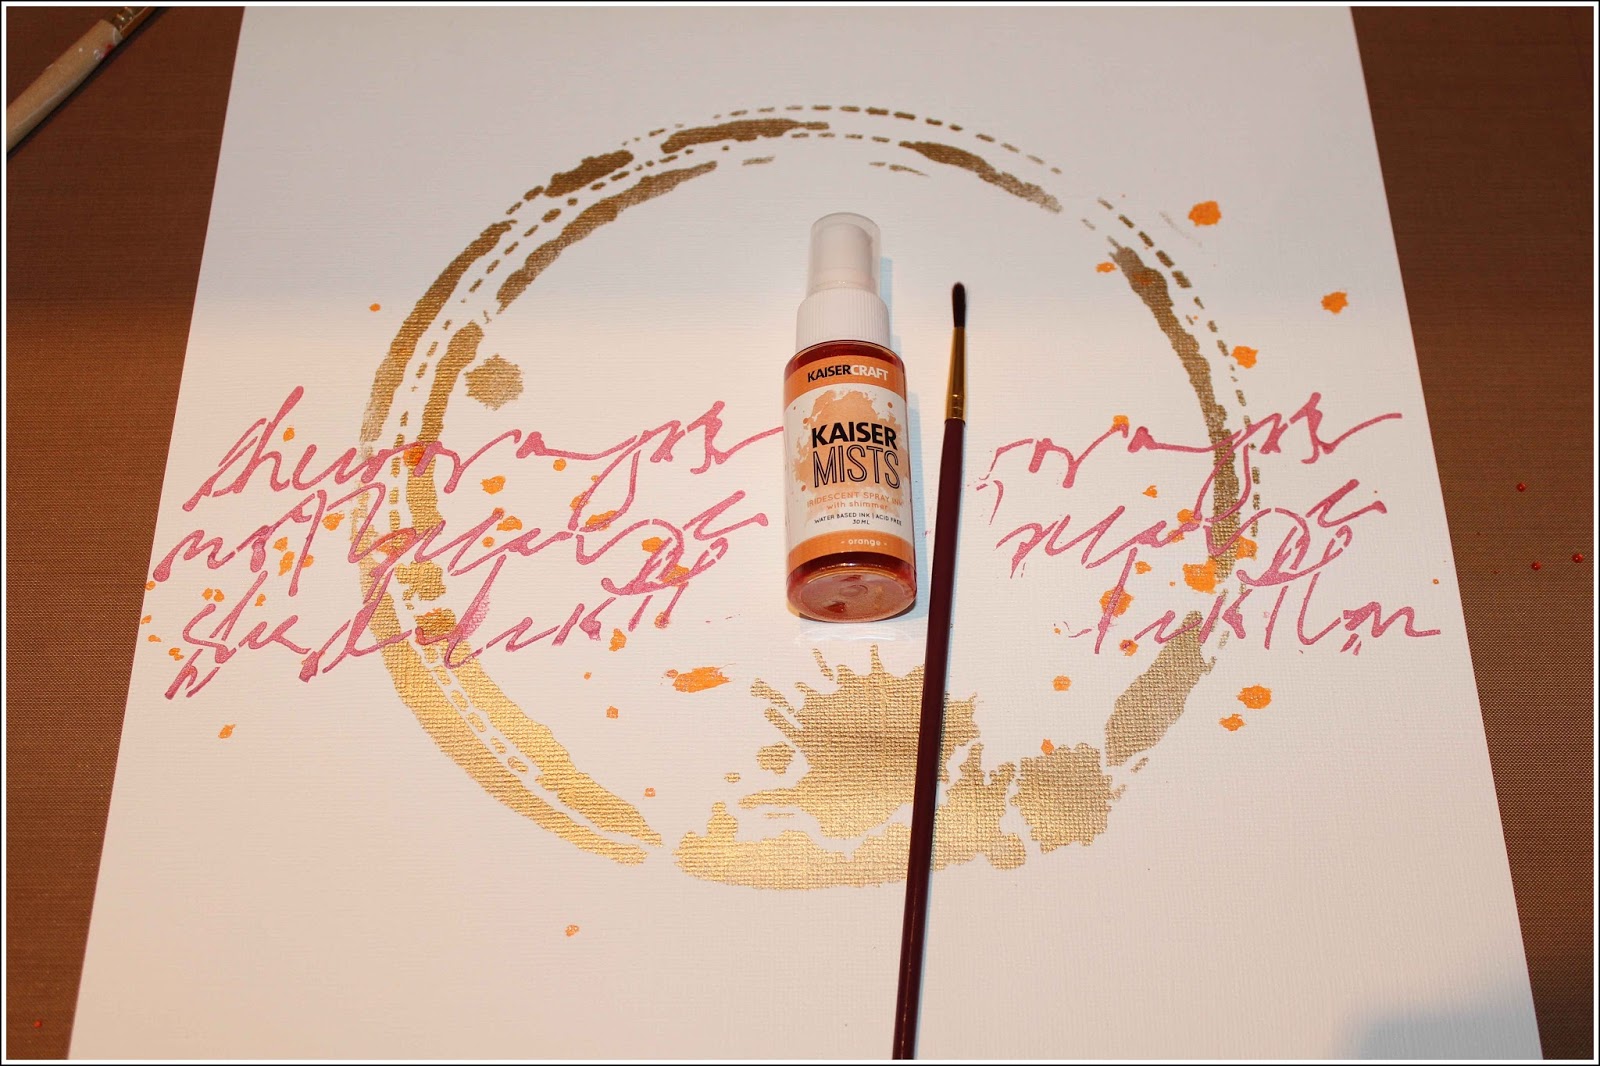
Gently dab some golden metallic acrylic paint on your paper, using a stencil.


Step 3.
 Add some 'vintage pink' mica powder to a bit of light paste. I use light paste because it's a really light, mousse kind of paste, and it blends very well with mica powder. The mica powder gives a very unique shimmer to the paste.


Step 4
Use a palette knife and a stencil to put the mica-mixed-paste on your paper.


Step 5. 
When paste is dry (it dries fast) splatter some orange ink on your cardstock with a brush.


Step 6. 
Glue down the pieces of paper with 3D gloss gel. I use a random piece of cardboard between some paper, to create more 3D effect in the layers.


Step 7. 
Cut some leaves with your die-cut machine. I inked the edges from the leaves with 'black soot' distress ink.


Step 8.
Embellish your project with the leaves, with flowers and other things you like (crystals or metal embellishments). I painted a piece of wire and some chipboard little hearts also with the golden metallic acrylic paint and used it on my photo and layout. I used 3D glue dots for my leaves to put them on my layout. 


Thank you Sanderijn for this step-by-step! Welcome back the day after tomorrow for the reveal of the November Challenge!

11/08/2015

Celebrate with Us & Caro Scrap

Today Caro shows her first ever project as part of the Words & Paintery Creative Team.


Tuto page " Une journée en famille " by CaroScrap


1) I use a watercolor sheet and covered that with Gesso

2 ) To create my page background I used gold paint and a stencil


3) I had fun creating a embellishment with gold embossing powder and tracing paper


4) I painted my diet cut frame with a brush and with diluted ink


and I also used the same color around my sheet


5) Now it´s time to organize my layout


I decided to add a little black gesso on my background and I used the glue gun to fasten the embellishments. By inserting small squares of foam between the leaves I  gave volume to my page


6) I added stamping wrote about my layout, I painted my embellishments with white gesso, and sprinkle drops of diluted gesso everywhere with my brush and a few golden sequins as finishing touch.

 
Please visit us the day after tomorrow for another tutorial.

11/06/2015

Let´s Celebrate with Us & Nupur Patel

Stretch your creativity and step out of the box.


Memories are special moments that tell a story a story to inspire, a story to live, a story to cherish
there is some magic in celebration everyone of us loves to celebrate
some celebrate by partying, some by writing, some with their loved one and some celebrate by documenting it as a piece of art.
So lets celebrate today with "Special Memories" canvas.


1, 2, 3...
and here we go
Lets ground the surface with the Art Basics - Finnabair's heavy white Gesso. Using the heat gun, heat the surface until its completely dry.

I stencilled the following pattern with the amazing texture magic Modelling paste. Dry it using the heat gun.


With the amazing home made vintage brown ink, paint the background with the paintbrush 
and let flow the paint through the texture. 


After a while dry it using the heat tool. With the Black archival ink stamp the amazing 7- dots studio text stamp. Then using the Brown distress stamp the gorgeous floral pattern. 


And now onto the emblishments.

With the Tim Holtz - Distress embossing ink, and Rangers Antique rust heat emboss the chosen chipboard and then using the glossy accent sprinkle some awesome Finnabair glass glitter - copper. 

The amazing Brilliance Galaxy Gold pigment ink dab the chosen sentiment. Love the shimmery look of it. 
Its time to garnish the amazing flower with some awesome Finnabair sparkling gold. Mix some golden glitter with the Art Basics softmatte gel and then using the brush apply it to flower.

Mix the amazing Art Basics 3d Matt gel with some Distress dry glitter. Use the brush to apply it on the flowers. Love the shimmery look of this!


Bingo and its all ready to be assembled.


Who doesnt love splattering! Using Art Bascis Finnabair Heavy Black Gesso. Splatter! Splatter and more splatter!


Thank you for stopping by

Happy Crafting

...Nupur...